Let's get you started with Newsletter Glue |
 Alex Vasquez | Issue # | Reading time: 4 mins Alex Vasquez | Issue # | Reading time: 4 mins |
Thanks for choosing Newsletter Glue. We simplify and speed up your newsletter publishing process so you can focus on the writing. |
Play around with this newsletter post for a quick tour of our features. |
- Sent a test email (1 minute)
- Customised newsletter blocks (3 minutes)
- Explored newsletter patterns (2 minutes)
|
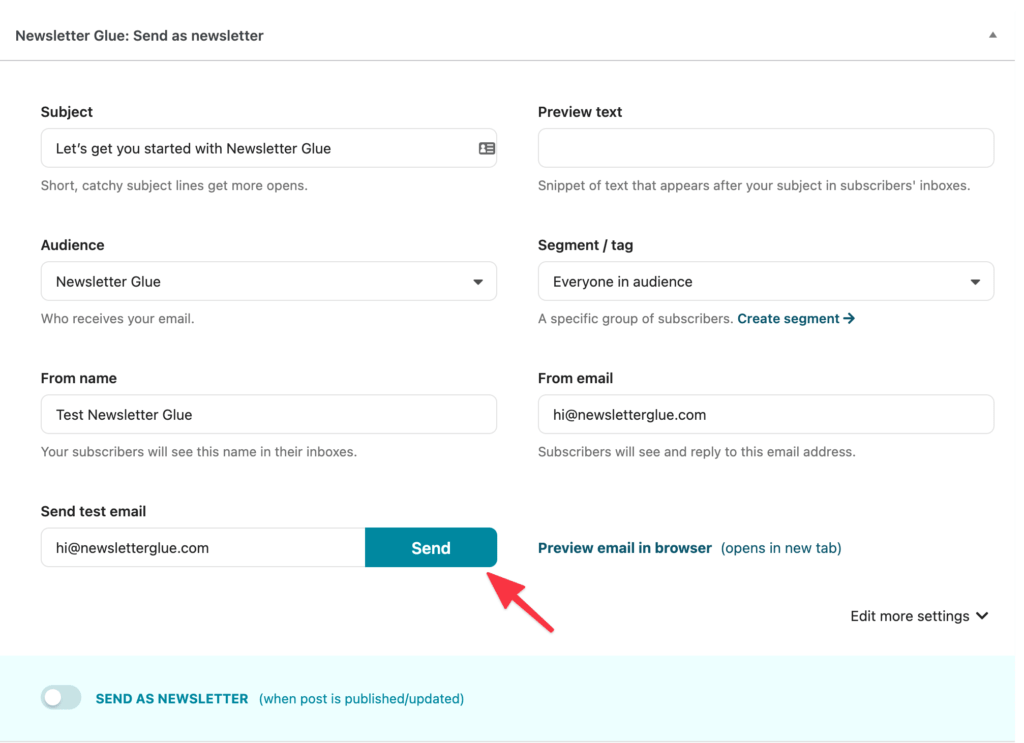
1. Send your first test email |
Scroll to the end of this post and look for Newsletter Glue: Send as newsletter and Send test email. |
Click the Send button. You'll receive this post as an email in your inbox. |
Go on! Try it now. I'll wait... |
Welcome back! That was easy, right? |
You can also Preview email in browser, which shows you the web view of the email without your blog theme. |
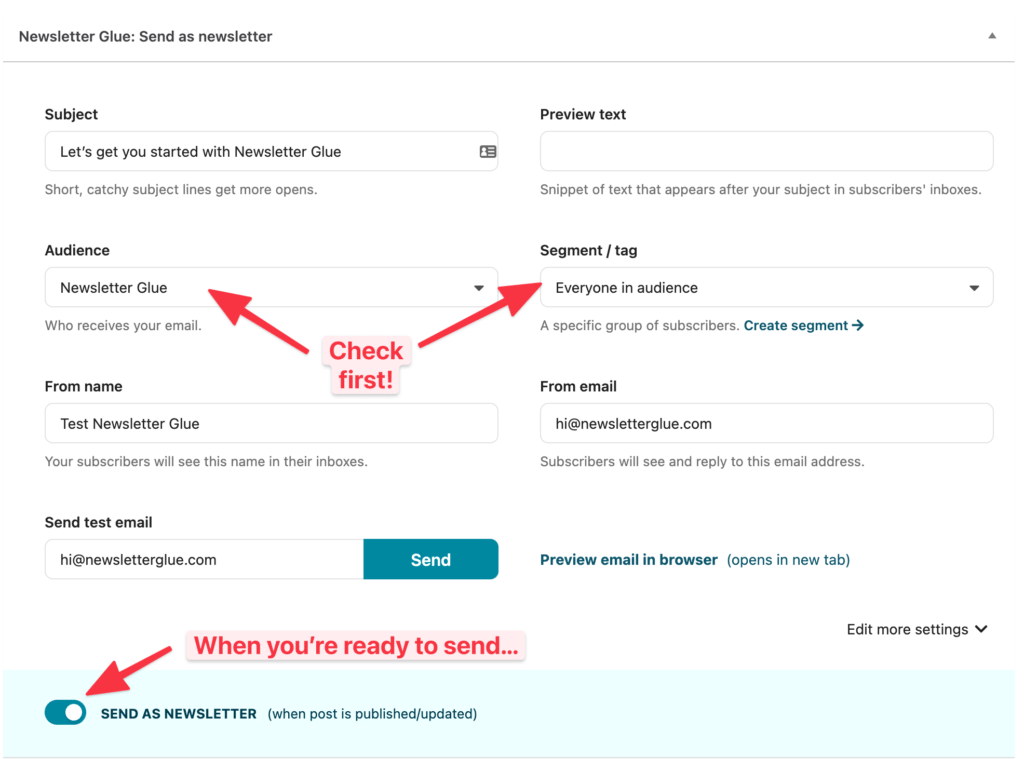
Send a real newsletter campaign |
To send a newsletter campaign, simply toggle Send as newsletter at the bottom. Then Publish the post normally. |
Make sure you select an audience tag that's for testing! You don't want to accidentally send this email to all your subscribers! |
2. Customise newsletter blocks |
Now that you know how to send email newsletters, let's talk about building them... |
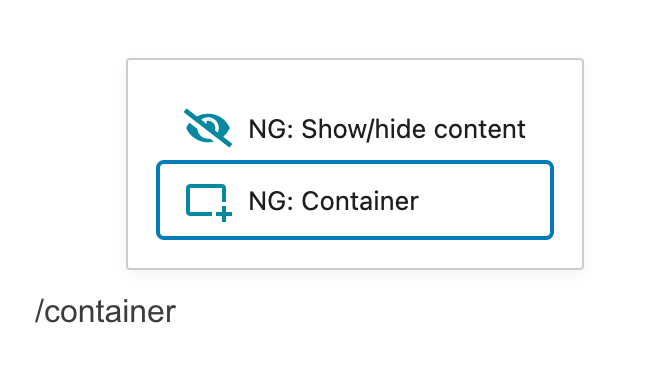
This section is created with our container block. |
1. Access it by typing /container. |
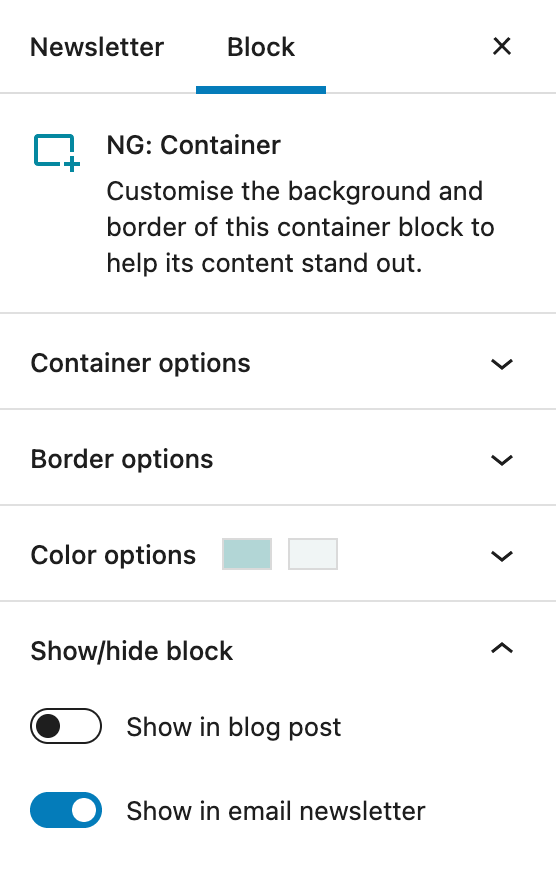
2. Click on the container block to begin customising it. Explore features in the right hand panel. |
3. Play around! Change the colours, borders and more! |
4. Scroll to the bottom of the panel, and find show/hide block. |
5. Toggle off Show in blog post. Then Preview this post like usual. You'll notice this entire section doesn't show up. |
This feature is available on all our newsletter blocks. |
|
|
|
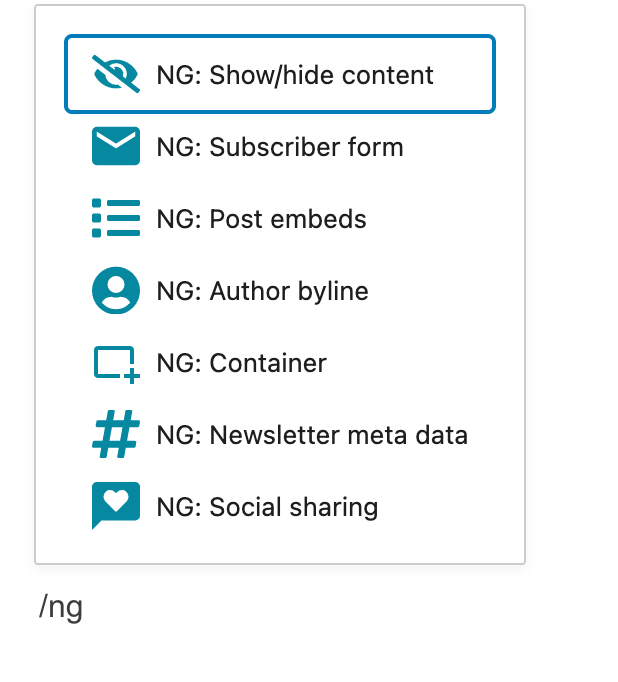
6 other newsletter blocks are waiting for you. |
Type /NG to bring up a list of all newsletter blocks or head to our docs to learn more. |
|
3. Add a newsletter pattern |
Adding newsletter patterns dramatically speed up your newsletter workflow. |
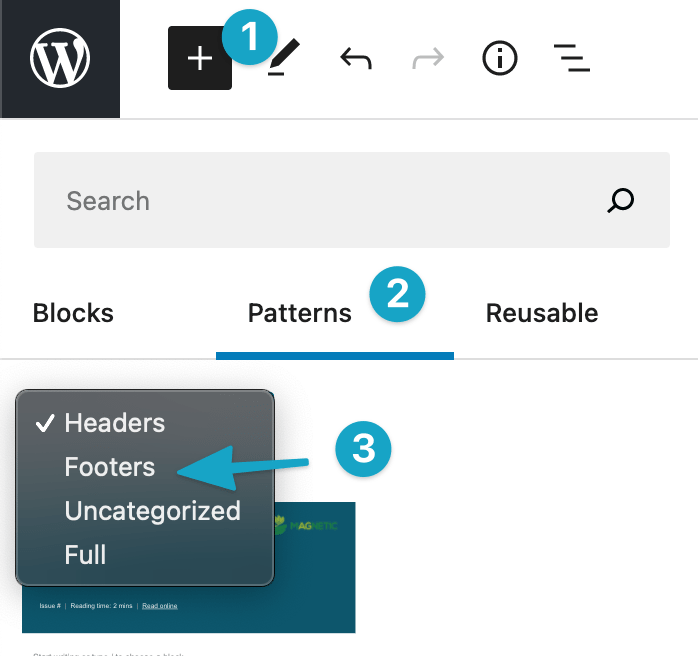
Let's add a Footer pattern to this newsletter: |
- Click Add block (blue square button, top left hand corner)
- Go to Patterns tab
- Select Newsletter footers category
|
Then choose a footer you like and add it to this email. |
When you're ready, send yourself another test email or simply Preview email in browser. |
Dive deeper into patterns |
Watch and learn more about what you can do with patterns. |
Build and edit your own patterns |
In your WP Admin, head to Newsletter Glue > Templates & Styles. |
|
|
You've reached the end of this tutorial! |
Hooray! You're a newsletter pro! |
If you're itching for more, here’s what you can do next: |
2. Check us out on Twitter for updates. |
|
|
|